how to collect your hair sample
PLEASE READ ALL INSTRUCTIONS *BEFORE* YOU BEGIN. IF YOU HAVE QUESTIONS, SEND ME AN EMAIL.
before collecting your sample
!! Make sure the following statements are true before continuing !!
If one or more is not true, please reach out to me before collecting your hair sample.
- Hair is untreated at scalp with at least one full inch of virgin hair (8-10 weeks of growth) – no dye, bleach, perm, chemical straightener, or other process of any kind
- Hair is clean and free from product – no gel, cream, mousse, leave-in conditioner, oil, medicated shampoos, or other hair products of any kind
- Hair is free from external contaminants – no sweat, fuzz, cigarette smoke, dirt, chlorine, mechanical dust, or other contaminants of any kind
step one: collect needed items
Collect the following items to take your sample:
- a person you trust to help with the cutting part
- clarifying shampoo (recommended, but not required)
- distilled water (required to avoid contamination from your water)
- a pair of sharp stainless-steel scissors
- a comb (a tail comb is easiest but not required)
- one or more hair clips
- the blue “Hair Weight Scale” card included in your sampling kit
- the small white specimen envelope (fill in your name and shampoo name first!)
step two: wash your hair
Hop in the shower to shampoo and condition your hair as normal. Clarifying shampoo is recommended but not required.
While still in the shower, rinse your hair with distilled water, wring it out, and wrap it in a towel to keep it out of the tap water.
Let your hair air dry for 4-6 hours before taking the sample. Your hair should be mostly dry.
Do not add any hair products, including leave-in conditioner.
Try not to sweat in the time between your shower and taking your sample.
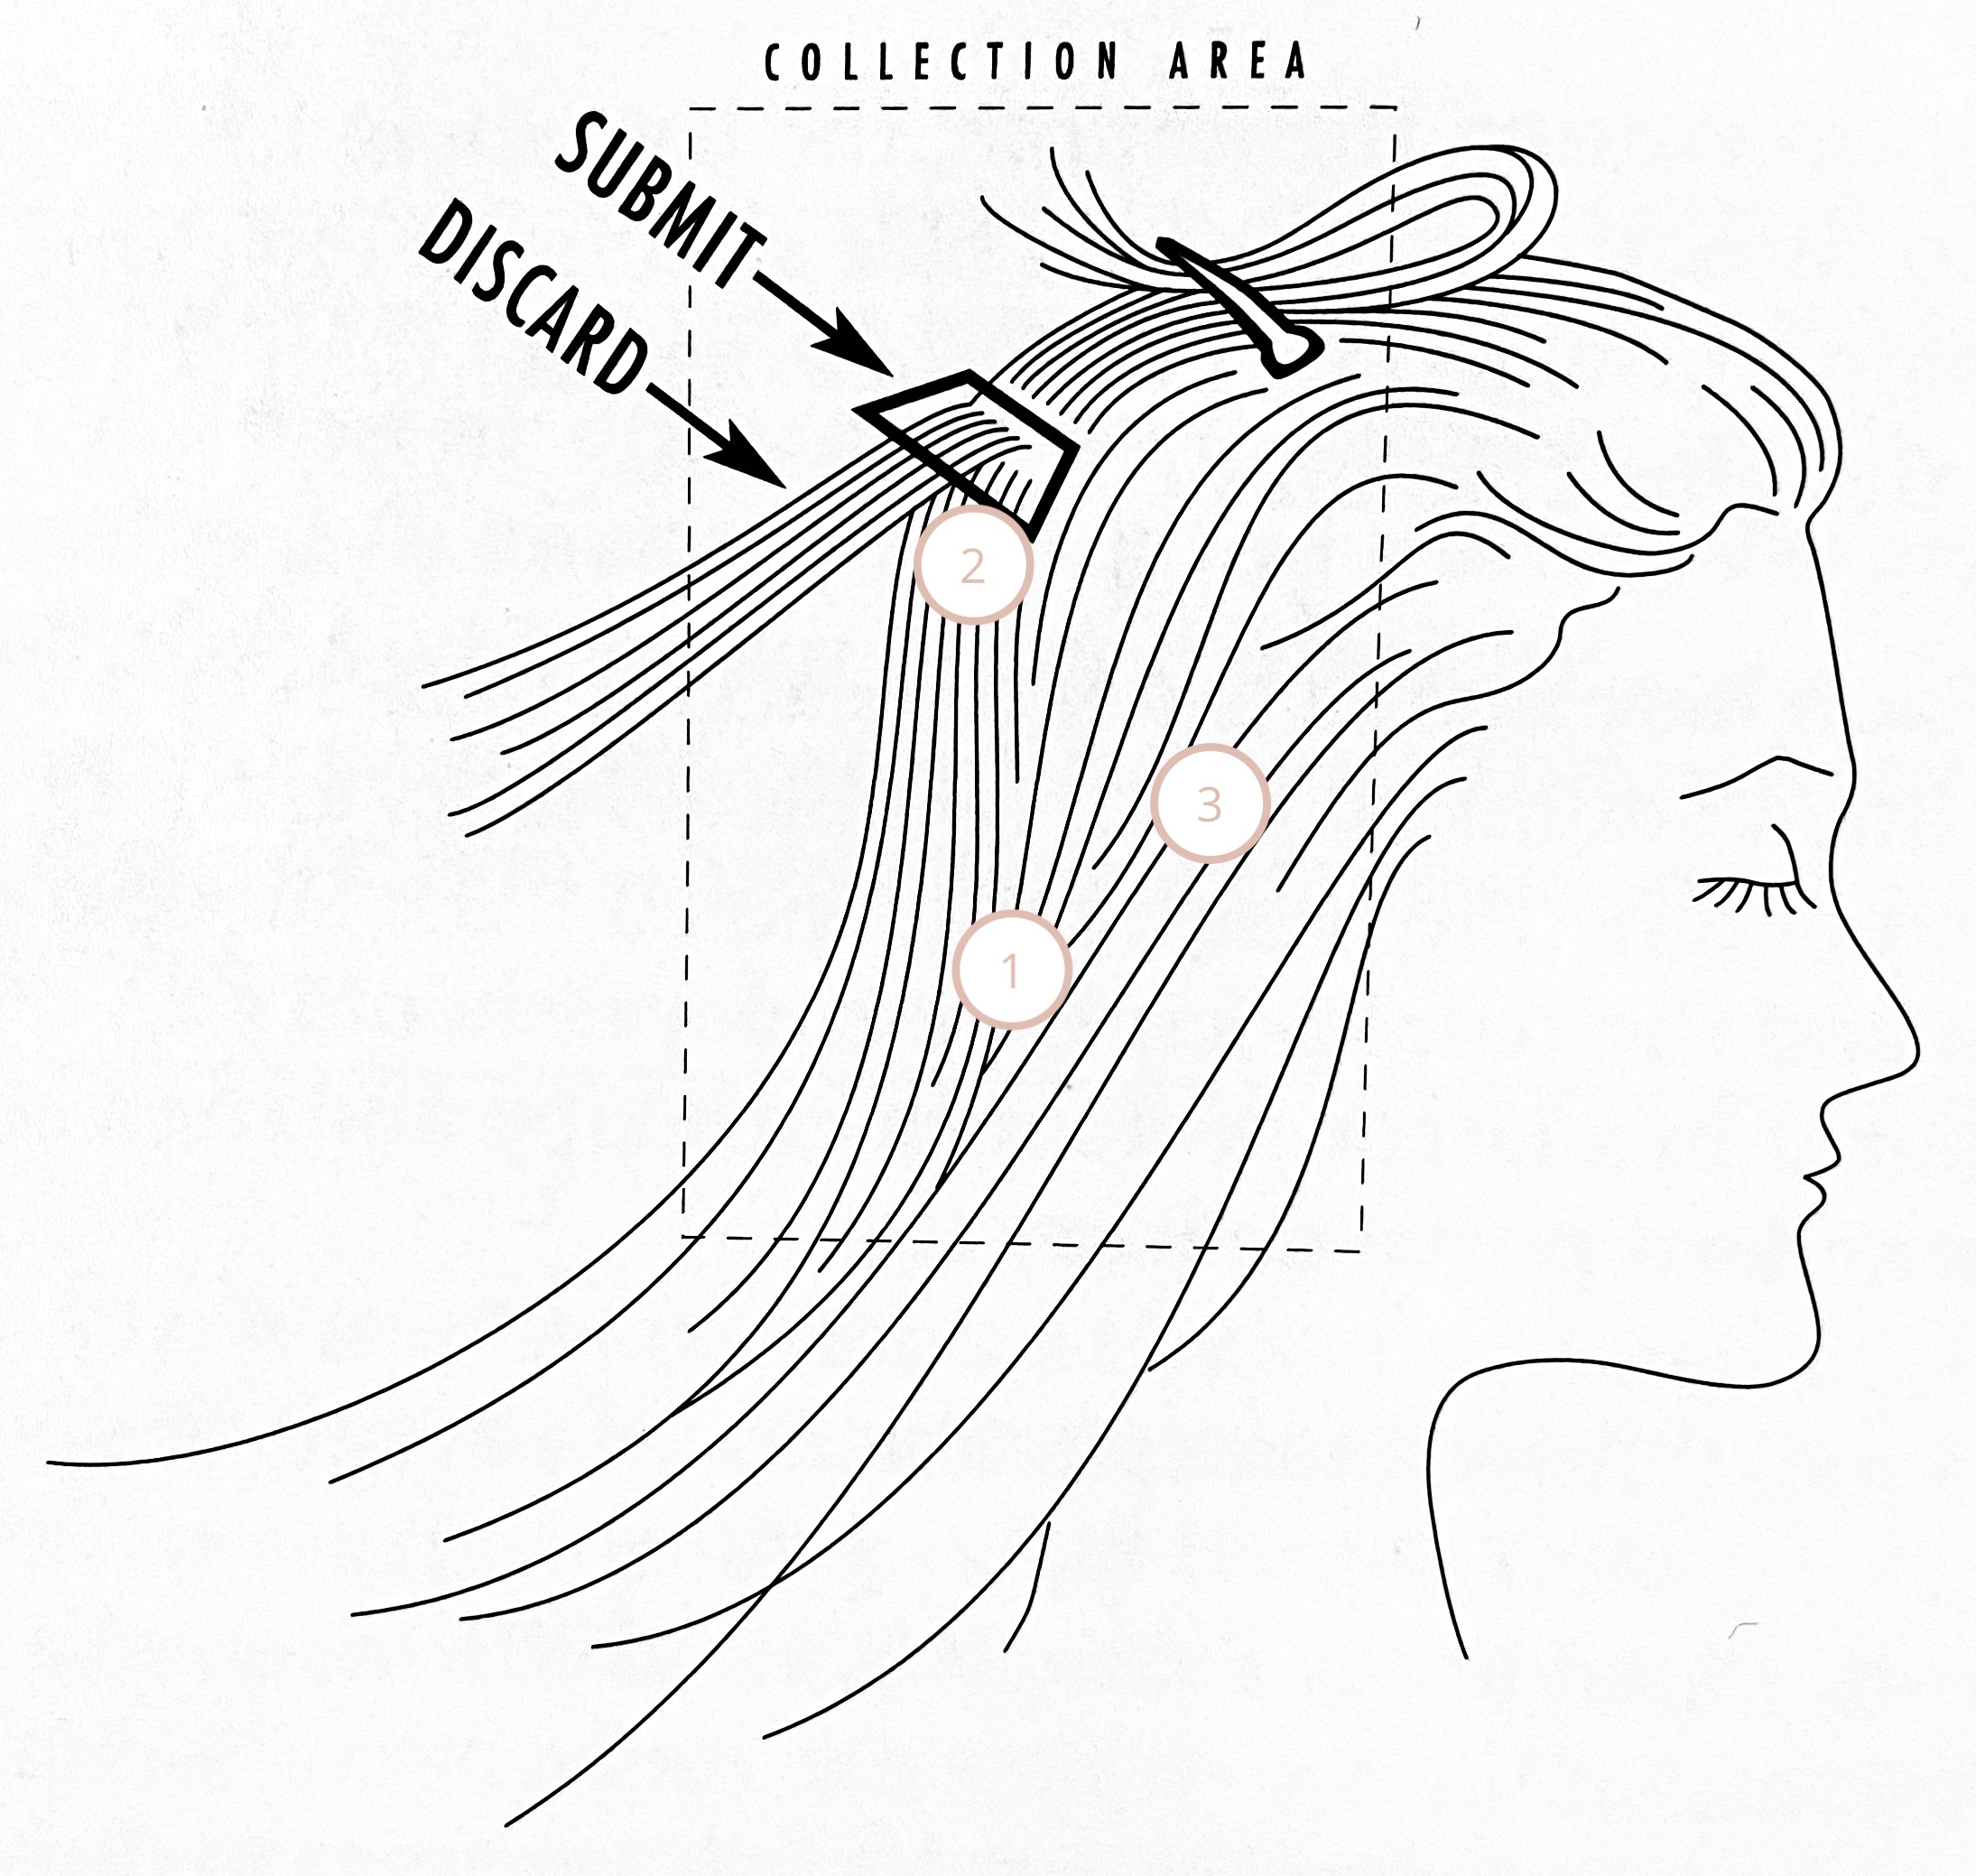
step three: section your hair
Your hair sample will need to be removed in small portions from 3-4 different locations on your head for the most accurate results. 30-50 hair strands per section is usually enough and will make for easier grow-out.
Recommended areas for collection are:
- The nape of your neck
- The rounded bone at the back of your head
- The section behind your ears inside your hairline
DO NOT CUT FROM THE EDGE OF YOUR HAIRLINE.
Using a comb and clips, have your trusted person part your hair and clip it away to remove the first section.
The diagram at right can be helpful in completing this step and the ones following.
step four: cut your sample
With scissors in hand, have your trusted person remove a small amount of hair from the first section.
Only a very small section is needed from each area; around 50 strands.
Hold the hair sample by the cut end and snip off the long end, leaving 3/4 to one inch of hair from the root end (hair closest to your scalp).
Place the hair sample on the “Hair Weight Scale” card as instructed on the card.
Continue with steps three and four on different sections of your head until side “A” of the card tips like a teeter-totter and touches the countertop from the correct weight of hair added.
step five: complete your kit
Once enough hair has been collected, dump the hair into the included specimen envelope and seal the envelope.
Fill out the highlighted portions on the included form.
Place the specimen envelope into the mailing envelope with the form, seal it, and place it into a mailbox to send it on it’s way to the lab.
You can discard the blue “Hair Weight Scale” card along with the unused portions of hair.
step six: mail your kit
ONCE YOU’VE MAILED THE SAMPLE, SEND ME AN EMAIL TO LET ME KNOW.
I will be on the lookout for your results, which typically arrive 2-3 weeks from the date your specimen is mailed. I will contact you via email once your results come in so we can schedule your next appointment.
have questions? let me know!
let's keep in touch
Receive my Macronutrient Guide for Mamas today, then occasional nutritional support and updates.
Thank you for subscribing! Your guide should be arriving shortly.